Introduction
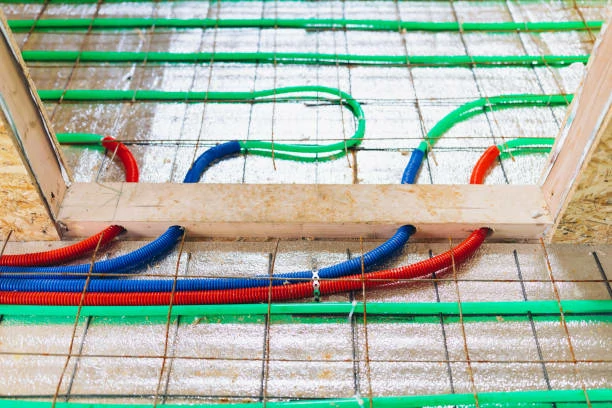
PEX tubes, or cross-linked polyethylene pipes, have become one of the most popular choices for modern plumbing systems due to their flexibility, durability, and cost-effectiveness. However, designing and sizing PEX tubes correctly is essential to ensure optimal performance and avoid potential plumbing issues. In this guide, we will walk you through the process of designing and sizing PEX pipe the right way, covering everything from flow rates to pipe diameter and installation best practices. By the end, you’ll have the knowledge you need to make informed decisions for your PEX plumbing system.
Why Proper Sizing and Design Matter
Correctly designing and sizing your PEX pipe system ensures that water pressure remains stable, flow rates are sufficient, and there are no unnecessary energy losses or costly system failures. Over-sizing can lead to wasted material costs and unnecessary complexity, while under-sizing can cause reduced water flow and pressure drops. Proper sizing balances performance with efficiency, making it a crucial step in any plumbing project.
Step 1: Determine Water Demand and Flow Rate
Before selecting the size of the PEX tubes for your plumbing system, you must calculate the water demand for each fixture in the system. Fixtures include sinks, showers, bathtubs, washing machines, dishwashers, and toilets. Each fixture will have a specific flow rate, which you can typically find in the manufacturer’s specifications or plumbing code standards.
Here are some average flow rates for common plumbing fixtures:
- Shower: 2-3 gallons per minute (GPM)
- Sink: 1.5-2 GPM
- Toilet: 1.6-2.2 GPF (gallons per flush)
- Dishwasher: 1.5-2 GPM
- Washing machine: 2-3 GPM
Once you have the flow rate for each fixture, you can calculate the total water demand for the system. This is the cumulative flow rate of all fixtures that will be operating simultaneously. For example, if you plan to run two showers and a washing machine at the same time, you would add their respective flow rates together to determine the total water demand.
Step 2: Calculate the Required Pipe Size
The size of the PEX tubes you need depends on the total water demand (flow rate) and the length of the pipe run. The longer the pipe run, the more friction there is, which can reduce water pressure. The goal is to size the pipes in a way that ensures adequate water pressure at each fixture, even during peak demand.
The general rule of thumb for sizing PEX pipes is as follows:
- 1/2-inch PEX: Suitable for low-flow fixtures like sinks or toilets.
- 3/4-inch PEX: Ideal for mid-sized fixtures, such as showers or washing machines.
- 1-inch PEX: Used for high-demand areas like main water supply lines, larger fixtures, or homes with high water usage.
To size the pipe more accurately, you’ll need to refer to a PEX sizing chart or use a pipe sizing calculator. These tools help account for factors like water flow, pressure loss due to friction, and the total length of the pipe run.
Step 3: Understand Pressure Loss and Its Impact
Pressure loss occurs as water moves through pipes, primarily due to friction between the water and the interior surface of the pipe. The longer the PEX tube, the more friction there is, which can lead to a decrease in water pressure, especially in large or multi-story homes. This is a critical factor to consider when designing your system.
To minimize pressure loss, you may need to increase the pipe size for longer runs or higher water demand. For example, if you’re running a long distance from the main supply to the farthest bathroom, you may want to use 3/4-inch PEX rather than 1/2-inch PEX, even if the flow rate seems appropriate.
Step 4: Consider Pipe Material and Type
There are different types of PEX available, including PEX-A, PEX-B, and PEX-C, each with distinct properties. While all types are flexible and resistant to corrosion, PEX-A is the most flexible and easy to work with. It’s particularly beneficial for projects that require a lot of bending and turning. PEX-B and PEX-C are more rigid but are still widely used in plumbing systems.
When sizing your PEX tubes, make sure to consider the type of PEX you are using, as different types may have slightly different pressure ratings and friction loss characteristics. In general, PEX-A is often the best choice for residential systems due to its superior flexibility and resistance to cracking.
Step 5: Account for Temperature and Pressure Requirements
PEX pipes can handle a wide range of temperatures, but it’s important to account for the temperature and pressure at which your system will operate. Most PEX tubes are rated to handle temperatures up to 200°F (93°C) and pressures of up to 80-100 PSI, depending on the type and manufacturer.
In colder climates, you’ll need to take extra precautions to avoid freezing, which can damage the pipes. PEX is more freeze-resistant than copper or PVC pipes, but it’s still a good idea to insulate pipes in unheated areas or use larger diameters to ensure smooth flow even during colder months.
Step 6: Plan for Branches and Manifolds
PEX systems often use manifolds, which are central hubs that distribute water to multiple branch lines. When designing a PEX system, you’ll need to determine the layout of the branches and the best place to install the manifold. Keep in mind that each branch line should be as short as possible to minimize pressure loss.
Consider the flow demand for each branch and size the pipes accordingly. For example, if you have a single bathroom on one branch, 1/2-inch PEX might be sufficient, but for a kitchen and two bathrooms, 3/4-inch PEX may be necessary.
Step 7: Understand Local Codes and Regulations
Before beginning installation, make sure to consult local plumbing codes and regulations. These codes may have specific requirements for PEX pipe installation, including approved materials, methods for securing pipes, and insulation guidelines. Some areas may also have minimum pipe sizes for specific applications, so it’s essential to adhere to these guidelines to ensure a safe and compliant system.
Step 8: Install and Test the System
After sizing and designing your PEX system, the next step is installation. During installation, make sure that you follow the manufacturer’s guidelines for securing the PEX tubes, avoiding sharp bends, and preventing any kinks in the pipes. Once the system is installed, conduct a pressure test to ensure there are no leaks and that the system can handle the expected water flow without any significant pressure drops.
Conclusion
Designing and sizing PEX tubes properly is critical to the success of any plumbing project. By carefully calculating water demand, considering factors like pipe length, pressure loss, and temperature, you can ensure a reliable and efficient plumbing system. PEX pipes offer a flexible, durable, and cost-effective solution for water distribution, but proper planning and installation are key to unlocking their full potential.
FAQs
- What size PEX pipe should I use for a shower? A 3/4-inch PEX pipe is generally recommended for showers, as it provides adequate flow while maintaining water pressure.
- How do I calculate the flow rate for my plumbing system? Add up the flow rates (in GPM) for all fixtures that will run simultaneously. You can find the flow rate for each fixture in its specifications or plumbing codes.
- Can I use PEX for the main water supply line? Yes, PEX is suitable for main water supply lines, typically using 1-inch PEX for high-demand areas.
- How long can I run PEX pipe before pressure loss becomes an issue? The acceptable length for PEX pipe depends on its diameter and the water demand. Generally, longer runs require larger pipes to minimize pressure loss.
- Can PEX be used for hot water lines? Yes, PEX is ideal for both hot and cold water lines. It can withstand temperatures up to 200°F (93°C), making it perfect for hot water systems.