For many RV enthusiasts, the joy of travel is matched only by the comforts of home. However, one essential plumbings modification often gets overlooked: the RV shut-off valve. Priced at around $15, this simple addition can save you from a myriad of plumbings headaches and ensure a smooth, enjoyable camping experience. In this article, we’ll explore the benefits of the RV shut-off valve, its installation process, and why it’s a must-have for every RV owner.
Understanding the RV Plumbing System
Before delving into the specifics of the shut-off valve, it’s important to understand how the plumbing system in an RV works. RV plumbing systems typically consist of:
- Freshwater System: This includes the freshwater tank, pump, and lines that supply water to faucets, showers, and toilets.
- Gray Water System: This collects wastewater from sinks and showers before it’s discharged.
- Black Water System: This is used for toilet waste and requires careful management.
In such a compact system, any plumbing issue can quickly escalate, making preventive measures essential.
What is an RV Shut-Off Valve?
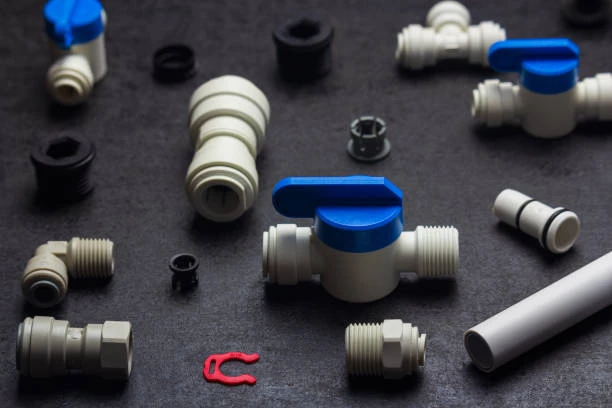
An RV shut-off valve is a simple device that controls the flow of water within your RV’s plumbing system. It can be installed in various locations, but is most commonly placed between the water source (freshwater tank or city water inlet) and the rest of the plumbings system. By manually or automatically stopping the flow of water, the shut-off valve serves several important functions.
Why You Need an RV Shut-Off Valve
1. Leak Prevention
One of the primary benefits of installing a shut-off valve is its ability to prevent leaks. Water lines in RVs are often subject to vibrations, temperature fluctuations, and other stresses that can lead to leaks over time. A shut-off valve allows you to quickly stop the flow of water, preventing damage from leaks that could occur during travel or while parked.
2. Winterization Made Easy
For RV owners, winterization is a crucial part of maintenance. When temperatures drop, it’s essential to drain the water system to prevent freezing and cracking. The shut-off valve simplifies this process by allowing you to easily isolate the water system. By shutting off the water supply, you can drain the system quickly and efficiently.
3. Convenient Repairs
If you need to perform repairs on your plumbing system, a shut-off valve can be a lifesaver. It allows you to isolate sections of your plumbing, meaning you don’t have to drain the entire system to fix a minor issue. This convenience can save you time and hassle.
4. Increased Control
Having a shut-off valve gives you greater control over your water supply. Whether you’re dealing with a malfunctioning faucet, toilet, or pipe, you can quickly stop the flow of water without worrying about a mess or flooding.
5. Enhanced Safety
In an emergency, being able to shut off the water supply quickly can prevent significant damage. If you notice a leak or flooding, reaching for the shut-off valve can save your RV from water damage that could lead to costly repairs.
Installing the RV Shut-Off Valve
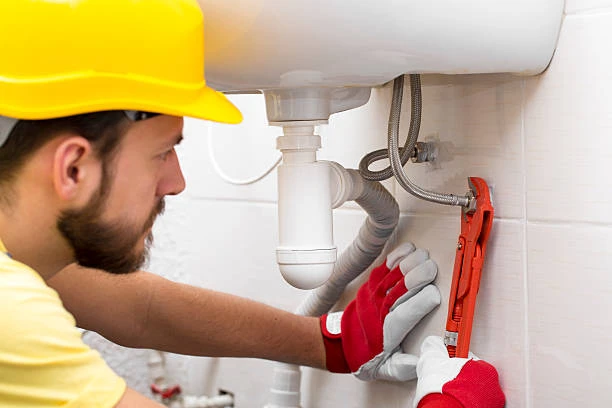
Installing a shut-off valve is a straightforward process that most RV owners can handle themselves with basic plumbings tools. Here’s a step-by-step guide to get you started:
Tools and Materials Needed
- RV shut-off valve (available at most RV supply stores)
- Pipe cutter or saw
- Teflon tape or pipe thread sealant
- Adjustable wrench
- Bucket or towel (for catching any residual water)
Step-by-Step Installation
- Locate the Installation Site: Identify where you want to install the shut-off valve. This is typically between the freshwater tank and the plumbing system or near the city water inlet.
- Shut Off the Water Supply: Before you begin, make sure to turn off the water supply to your RV. If your RV is equipped with a water pump, switch it off as well.
- Cut the Water Line: Using a pipe cutter or saw, cut the water line at the chosen location. Make sure to have a bucket or towel handy to catch any residual water that may escape.
- Prepare the Pipe Ends: After cutting, ensure that the ends of the pipe are clean and smooth. Remove any burrs or sharp edges that could impede a good seal.
- Attach the Shut-Off Valve: Apply Teflon tape or pipe thread sealant to the threads of the shut-off valve. Attach the valve to the pipe ends, tightening it with an adjustable wrench. Ensure that it is secure but avoid overtightening, which can cause damage.
- Test the Installation: Once the valve is installed, turn the water supply back on and check for leaks around the valve. If you notice any, tighten the connections as needed.
- Label the Valve: For future reference, label the shut-off valve clearly to indicate its purpose. This will help anyone using the RV understand its function.
Maintenance Tips for Your Shut-Off Valve
To ensure your RV shut-off valve functions optimally, regular maintenance is important:
- Inspect Regularly: Check the valve and surrounding pipes for signs of wear or leaks at least once a season.
- Exercise the Valve: Occasionally open and close the valve to keep it operational. This prevents it from becoming stuck due to inactivity.
- Clean the Area: Keep the area around the valve clean and free from debris, which can interfere with its operation.
Cost-Benefit Analysis
Considering the low cost of around $15 for an RV shut-off valve, the benefits far outweigh the investment. Here’s a quick breakdown:
Initial Cost: $15
Potential Savings:
- Avoiding Water Damage: Water damage repairs can run into the thousands of dollars.
- Reduced Winterization Costs: Simplifying winterization saves time and potential costs from damage due to freezing.
- Minimized Repair Expenses: Isolating sections of your plumbings can reduce labor costs for repairs.
In essence, the small upfront investment in a shut-off valve can lead to significant savings and peace of mind.
Conclusion
The RV shut-off valve is a simple yet effective plumbing modification that every RV owner should consider. From preventing leaks to making winterization easier, the benefits are numerous and impactful. With a straightforward installation process and minimal cost, this modification is a wise investment in the longevity and reliability of your RV’s plumbings system. Don’t overlook this essential upgrade—install an RV shut-off valve and enjoy the peace of mind that comes with it.
Frequently Asked Questions (FAQs)
1. How do I know if I need a shut-off valve?
If you frequently experience plumbing issues, perform winterization, or want greater control over your water supply, a shut-off valve is beneficial.
2. Can I install a shut-off valve myself?
Yes, the installation process is straightforward and can typically be completed with basic plumbing tools.
3. How often should I check my shut-off valve?
It’s a good practice to inspect the valve and surrounding pipes at least once a season for signs of wear or leaks.
4. What if my shut-off valve is leaking?
If you notice a leak, try tightening the connections. If the leak persists, the valve may need to be replaced.
5. Are there different types of shut-off valves?
Yes, shut-off valves come in various styles and sizes. Choose one that is compatible with your RV’s plumbing system.


