Introduction
Installing PPR pipes and fittings can seem daunting, but with the right approach, it becomes a straightforward process. PPR, or Polypropylene Random Copolymer, is known for its durability and versatility, making it a popular choice in plumbing. This guide will walk you through the essential steps for a successful installation.
Tools and Materials Needed
Before starting your installation, gather the following tools and materials:
- Tools:
- Pipe cutter or saw
- Fusion machine (for socket fusion)
- Deburring tool
- Measuring tape
- Marker
- Safety gloves and goggles
- Materials:
- PPR pipes
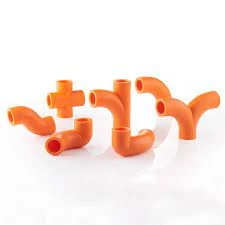
- PPR fittings (elbows, tees, etc.)
- Insulation tape (if required)
Preparation Before Installation
Site Assessment
Before you begin, assess the site where the installation will take place. Check for any obstacles, existing plumbing, and the overall layout.
Planning the Layout
Plan the route for your PPR pipes, considering both functionality and aesthetics. Ensure there’s enough space for fittings and that the installation complies with local plumbing codes.
Cutting the PPR Pipe
- Recommended Techniques: Use a pipe cutter for clean, straight cuts. If using a saw, ensure the blade is suitable for plastic.
- Measuring and Marking: Measure the lengths of pipe needed and mark them clearly. Double-check measurements to avoid errors.
Cleaning the Pipe Ends
Clean the ends of the pipes and fittings to ensure a secure connection. Use a cloth or sponge to remove any dust or debris. A clean surface helps achieve a better fusion.
Heating Process for Socket Fusion
- Overview of the Heating Method: For socket fusion, heat the ends of the pipe and fitting using a fusion machine.
- Ideal Temperature and Timing: The optimal temperature for PPR is around 260°C (500°F). Heating should typically last between 5 to 10 seconds, depending on the pipe diameter.
Joining the Pipe and Fittings
- Proper Alignment: Quickly align the heated pipe end with the fitting. The alignment is crucial for a proper fit.
- Techniques for a Secure Fit: Firmly push the pipe into the fitting, ensuring it’s seated correctly. Hold the joint for a few seconds to allow it to bond.
Cooling the Joint
Allow the joint to cool undisturbed for at least 5 minutes. This is crucial for the joint to set properly. Avoid moving the joint during this time to ensure strength.
Testing the Installation
After the joint has cooled, it’s essential to test for leaks:
- Methods for Checking Integrity: Apply pressure to the system gradually and observe for any leaks.
- What to Look For: Inspect the joints closely for any signs of moisture or water leaks.
Maintenance Tips Post-Installation
- Routine Checks: Regularly inspect the piping for signs of wear, leaks, or damage.
- Troubleshooting Common Issues: If you encounter leaks, check the joints for proper fusion and reseal if necessary.
Conclusion
In summary, installing PPR pipes and fittings involves careful preparation and attention to detail. By following these steps, you can ensure a successful and long-lasting plumbing system. The benefits of PPR—like its durability and ease of use—make it a fantastic choice for any project.
FAQs
- What tools do I need to install PPR pipes?
- You’ll need a pipe cutter, fusion machine, measuring tape, and cleaning supplies.
- How long should I heat the PPR pipe?
- Typically, heating lasts about 5-10 seconds at 260°C (500°F).
- Can I use PPR for hot water applications?
- Yes, PPR pipes are designed to handle both hot and cold water.
- What should I do if I find a leak after installation?
- Inspect the joint for proper fusion, and if necessary, reheat and reseal.
- How often should I check my PPR plumbing?
- Regular inspections every few months are recommended to ensure everything is in good condition.