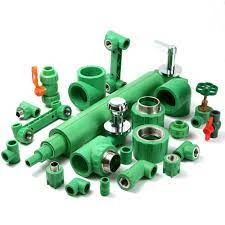
Installing PPR pipes and fittings has become a popular choice for plumbing systems due to their durability, flexibility, and resistance to various chemicals. Fred, an experienced plumber, shares his insights on installing PPR pipe and fittings effectively, ensuring a reliable and long-lasting plumbing system. This article will guide you through the benefits, installation process, and maintenance tips for PPR pipes and fittings.
What are PPR Pipes and Fittings?
PPR pipes are made from polypropylene, a type of plastic known for its strength and resistance to high temperatures and pressures. PPR fittings, designed to connect sections of pipe, are equally robust and versatile. Together, they form a reliable plumbing system suitable for both hot and cold water applications.
Key Features of PPR Pipes
- High Durability: PPR pipes are resistant to corrosion, scaling, and chemical reactions, making them suitable for a wide range of applications.
- Temperature Resistance: They can handle temperatures up to 95°C (203°F), making them ideal for hot water systems.
- Lightweight: PPR pipes are lightweight, making them easier to handle and install compared to traditional materials like metal.
- Low Thermal Conductivity: This property helps to reduce heat loss, improving the efficiency of hot water systems.
Benefits of Using PPR Pipes and Fittings
- Cost-Effective: PPR pipes are generally more affordable than metal alternatives, reducing overall project costs.
- Ease of Installation: The lightweight nature and simple joining methods make installation quick and efficient.
- Long Lifespan: With a lifespan of over 50 years, PPR pipes and fittings provide excellent value for money.
- Eco-Friendly: PPR is recyclable, making it a more environmentally friendly option compared to other plastic materials.
Fred’s Installation Process
Fred emphasizes that proper installation is crucial for maximizing the benefits of PPR pipes and fittings. Here’s his step-by-step process:
Step 1: Gather Tools and Materials
Before starting, Fred gathers all necessary tools and materials, including:
- PPR pipes
- PPR fittings (elbows, tees, couplings, etc.)
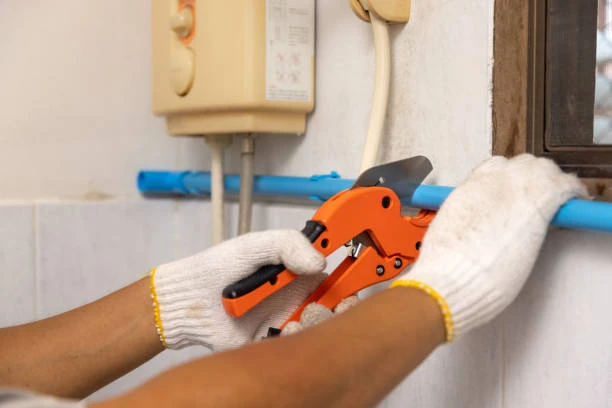
- Pipe cutter
- Heat fusion tool
- Measuring tape
- Marker
- Safety gear (gloves, goggles)
Step 2: Measure and Cut
Fred measures the lengths of PPR pipe required for the installation. Using a pipe cutter, he makes clean, straight cuts. This is important to ensure a snug fit with the fittings.
Step 3: Prepare the Fittings
Next, Fred prepares the fittings. For heat fusion, he ensures that the ends of both the pipe and fitting are clean and free from debris. A clean surface allows for better bonding.
Step 4: Heat Fusion Process
Fred uses a heat fusion tool to join the PPR pipe and fittings. Here’s how:
- He heats the end of the pipe and the fitting simultaneously, following the manufacturer’s specifications for time and temperature.
- Once adequately heated, he quickly removes them from the heater and pushes them together, ensuring a tight fit.
- He holds the connection for a few seconds to allow it to cool and set properly.
Step 5: Testing the System
After installation, Fred tests the system for leaks. He pressurizes the pipes and inspects all connections. If any leaks are detected, he makes the necessary adjustments.
Maintenance Tips for PPR Pipes
Fred believes that regular maintenance can significantly extend the lifespan of PPR pipes and fittings. Here are his tips:
- Routine Inspections: Check for any signs of wear or damage, especially at connection points.
- Avoid Excessive Pressure: Ensure that the system operates within the recommended pressure limits to prevent damage.
- Keep Pipes Insulated: Insulate pipes in unheated areas to prevent freezing during colder months.
- Use Proper Supports: Install pipe supports to prevent sagging and maintain proper alignment.
Conclusion
Fred’s experience with installing PPR pipes and fittings highlights the efficiency and reliability of this plumbing solution. With their durability and ease of installation, PPR systems are an excellent choice for both residential and commercial plumbing projects. By following best practices during installation and maintenance, you can ensure a long-lasting plumbing system.
FAQs
Insulating PPR pipes is recommended, especially in unheated areas, to prevent freezing and reduce heat loss in hot water systems.
What are the advantages of PPR pipes over traditional materials?
PPR pipes are lightweight, resistant to corrosion, and suitable for both hot and cold water applications, making them more versatile and cost-effective.
Can PPR pipes be used for outdoor applications?
Yes, PPR pipes can be used outdoors; however, they should be protected from direct sunlight to prevent degradation.
How long do PPR pipes last?
PPR pipes typically have a lifespan of over 50 years with proper installation and maintenance.
What tools are needed for installing PPR pipes?
Essential tools include a pipe cutter, heat fusion tool, measuring tape, and safety gear.
Is it necessary to insulate PPR pipes?


