Introduce PPR Pipe
When a construction or plumbing project using Polypropylene Random Copolymer (PPR) pipes is completed, one of the most important steps for contractors, project managers, and clients is to ensure that the installation has been done properly. Accepting the PPR Pipe after the project is finished involves several critical steps to confirm the quality of the installation, compliance with safety standards, and the functionality of the piping system. In this comprehensive guide, we will explore how to properly accept PPR pipes after a project is completed, covering key considerations, inspection processes, and best practices to follow to ensure a successful handover.
What is PPR Pipe?
Polypropylene Random Copolymer (PPR) pipes are a popular choice for modern plumbing systems due to their durability, resistance to corrosion, and ability to withstand high temperatures and pressures. They are widely used for cold and hot water distribution, heating systems, and industrial applications. PPR pipes offer a long lifespan and require minimal maintenance, making them a reliable choice for both residential and commercial installations.
However, ensuring that the PPR pipe system is correctly installed and functioning is crucial to prevent issues such as leaks, poor water pressure, or premature damage. The acceptance process is the final step in verifying the quality of the installation, ensuring that the PPR pipe system meets both technical and regulatory standards.
Key Steps in Accepting PPR Pipe After Installation
The process of accepting PPR pipes after the completion of a project is multifaceted, requiring attention to both the technical installation and the overall performance of the system. Below are the essential steps involve in the acceptance process:
1. Initial Visual Inspection
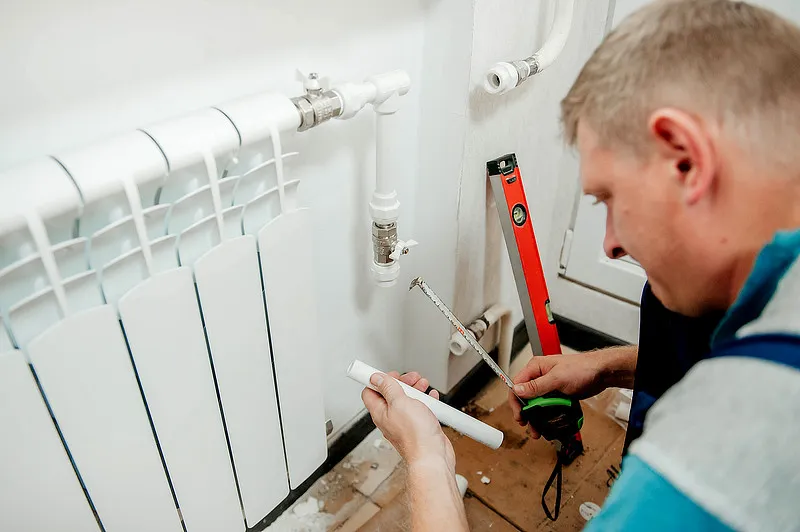
The first step in accepting the PPR pipe installation is to conduct a thorough visual inspection of the entire piping system. This includes checking for:
- Correct Pipe Placement: Ensure that all pipes are installe in the correct locations, following the project’s plans and specifications.
- Proper Jointing: Check for any signs of improper welding or connection. PPR pipes are typically joine using heat fusion, and the joints should be smooth and free from gaps or irregularities.
- Pipe Alignment: Verify that the pipes are properly aligne and do not have any visible bends, kinks, or deformations that could impede water flow or cause stress on the system.
- Support and Fixing: Ensure that the pipes are adequately supporte and secure, preventing them from sagging or moving over time. Proper support is essential to maintain the integrity of the system.
Visual inspections should be done in well-lit conditions to ensure no issues are overlooked.
2. Check for Correct Pipe Specifications
It is essential to verify that the PPR pipes installed match the specifications outlined in the project plans. The following should be checke:
- Pipe Diameter: Ensure that the diameter of the PPR pipes meets the requirements specified in the design. Incorrect pipe size can lead to issues with water pressure and flow rate.
- Pipe Material: Confirm that the pipes used are indeed high-quality PPR pipes, as specified. Verify that the material grade (e.g., PN10, PN16, or PN20) is appropriate for the specific project.
- Pipe Length: Check that the length of the pipes used corresponds to the measurements outlined in the project plans. Miscalculations can lead to unnecessary waste or shortages.
This step ensures that all materials used are compliant with project requirements, reducing the risk of future complications.
3. Pressure Testing
Pressure testing is one of the most critical steps in the acceptance process. It ensures that the PPR pipe system can withstand the required pressure without leaking or failing. Here’s how pressure testing should be done:
- Test Procedure: Typically, a pressure test involves filling the PPR pipe system with water and pressurizing it to a specified level (usually 1.5 times the maximum working pressure of the system). The test should be conducte for a specific duration to observe if there are any pressure drops or leaks.
- Monitoring for Leaks: During the pressure test, the entire system should be monitore for any signs of leakage. Leaks may indicate issues with the pipe joints or fittings, which need to be addresse before acceptance.
- Documenting the Results: The pressure test results should be documente and signe off by the appropriate parties to ensure that the system meets the required standards.
Passing the pressure test is an essential requirement before final acceptance of the PPR pipe system, as it guarantees that the pipes can safely handle the operational pressures they will be subjecte to in real-world conditions.
4. Flow Testing and Functionality Check
After pressure testing, it is important to conduct a flow test to ensure that water flows correctly through the system. This step involves:
- Flow Rate Verification: Ensure that the water flows at the expected rate through the pipes. If the flow rate is insufficient, it could indicate blockages, improper pipe size, or installation issues.
- Testing Fixtures: Open and close faucets, valves, and other fixtures connected to the system to confirm that they are functioning correctly and are free from leaks.
- Heat Resistance Check: For hot water systems, verify that the pipes can handle high temperatures without deforming or leaking. PPR pipes are know for their heat resistance, but this should still be teste to ensure proper functionality.

5. Compliance with Building Codes and Standards
During the acceptance process, ensure that the PPR pipe installation complies with all relevant local building codes and industry standards. This includes:
- Regulatory Requirements: Verify that the installation adheres to all local plumbing and construction regulations, which may dictate specific materials, installation methods, and pressure requirements.
- Manufacturer Guidelines: Ensure that the installation follows the manufacturer’s recommendations for installation practices, such as pipe support, welding, and installation angles.
This step is crucial for ensuring that the installation is legally compliant and safe for use.
6. Final Review and Handover Documentation
Once all inspections, testing, and verifications are complete, the final step is to review all documentation and formally accept the installation. This includes:
- Completion Report: A final report should be generate that summarizes all inspections, tests, and results. The report should also confirm that the PPR pipe installation meets all design, material, and regulatory requirements.
- Handover to Client: After ensuring that all issues are resolve and the system is fully functional, the project can be hande over to the client. This handover should include relevant warranties, maintenance guidelines, and contact information for any future inquiries or service needs.
7. Post-Installation Support and Maintenance
After the project is complete and the PPR pipe system is accepte, it is essential to provide ongoing support and maintenance to ensure long-term performance. This includes:
- Regular Inspections: Periodic inspections should be schedule to ensure the system remains in good condition and that no issues arise over time.
- Maintenance Training: If necessary, provide training for the client or building staff on how to maintain and troubleshoot the PPR pipe system to extend its lifespan.
- Warranty Services: Ensure that warranty information is provide and that clients are informe about the procedures for any necessary repairs or replacements.
Common Challenges in PPR Pipe Acceptance
While the process of accepting PPR pipes is relatively straightforward, there are some challenges that contractors and clients may face during the acceptance phase, including:
- Poor Installation: If the installation is not done according to manufacturer specifications, it can lead to problems such as leaks, pressure loss, or system failure.
- Improper Jointing: One of the most common issues with PPR pipe installations is improper welding of the joints, which can result in leaks and system failures.
- Insufficient Testing: Failure to conduct thorough pressure and flow tests can lead to undetected issues that may become problematic later on.
By addressing these challenges early in the process, the acceptance phase can be much smoother, ensuring that the PPR pipe system is safe and functional.
Frequently Asked Questions (FAQ)
1. How do I know if my PPR pipes are installe correctly?
Answer: Correct installation can be confirme through a visual inspection, pressure testing, and flow testing. Ensure that the pipes are aligne, joints are properly welde, and there are no leaks under pressure.
2. What pressure should the system be teste at?
Answer: Typically, PPR pipe systems should be teste at 1.5 times the maximum working pressure. For example, if the maximum working pressure is 10 bar, the test should be conducte at 15 bar.
3. Can I use PPR pipes for hot water systems?
Answer: Yes, PPR pipes are highly resistant to heat and can withstand temperatures up to 95°C, making them ideal for hot water applications.
4. How long do PPR pipes last?
Answer: PPR pipes typically last between 50 and 100 years when installed correctly and maintained properly. Their durability and resistance to corrosion contribute to their long lifespan.
5. What should I do if I notice a leak in my PPR pipe system after installation?
Answer: If a leak occurs, first shut off the water supply and identify the source of the leak. It may be necessary to re-weld the joint or replace the damaged section of pipe. Always consult a professional plumber for repairs.
By following these steps and best practices, the acceptance of PPR pipes can be done effectively, ensuring that the piping system is safe, functional, and compliant with all regulations.


