Introduction to PPR Pipe Testing
Testing is a critical step in ensuring the reliability and safety of any plumbing system, especially when using materials like PPR Pipe. PPR pipes are known for their longevity, resistance to chemicals, and ability to withstand high pressures and temperatures. However, to make sure they function as intended, it is essential to carry out specific tests during installation and throughout the system’s life.
Why Test PPR Pipe?
Testing PPR pipes ensures that the system will perform reliably without leaks, pressure loss, or other issues that could lead to costly repairs or system failures. Proper testing also guarantees that the pipes meet industry standards and are safe for their intended use, whether it’s for hot or cold water, or in industrial systems.
Types of PPR Pipe Tests
There are several tests you can perform on PPR pipes, ranging from basic visual checks to more advanced pressure and fusion quality tests. Let’s dive into the most common and essential types of tests.
Pre-Installation Tests
Before installing PPR pipes, it’s important to perform basic inspections and measurements to ensure the pipes are up to standard.
Visual Inspection
Start by visually inspecting the PPR pipes for any obvious defects such as cracks, scratches, or deformities. These imperfections can compromise the integrity of the pipe once it’s in use.
- Check for any visible damage such as punctures, kinks, or surface cracks.
- Examine the ends of the pipes to make sure they are clean and free from any debris or foreign particles that could affect the fusion process.
Measuring Pipe Dimensions
Accurate measurements of the pipe’s diameter and length are crucial for ensuring that the PPR pipe will fit the system’s requirements. Use a caliper or a measuring tape to verify the pipe’s dimensions.
- Check for compliance with the specifications provided by the manufacturer, especially for industrial or commercial installations.
- Ensure the pipe length matches the required measurements for your system’s design.
Pressure Testing for PPR Pipe
One of the most important tests for PPR pipes is pressure testing, which verifies that the pipes can withstand the internal pressures of the plumbing system without leaking or bursting.
What is Pressure Testing?
Pressure testing involves pressurizing the piping system and monitoring its ability to maintain a certain pressure over a specified period. This test checks for leaks, weaknesses, or points of failure in the system.
How to Perform a Pressure Test on PPR Pipe
- Prepare the System: Ensure all joints are fused and secure before starting the test.
- Seal the System: Close all valves and seal the ends of the PPR pipes.
- Apply Pressure: Use a pressure pump to gradually increase the pressure inside the system. Follow the manufacturer’s recommended pressure levels (usually 1.5 times the working pressure).
- Monitor for Leaks: After reaching the desired pressure, monitor the system for any signs of leaks or pressure loss.
- Keep Pressure Constant: Maintain the pressure for at least 30 minutes to ensure the system can hold it without any issues.
Leak Testing for PPR Pipe
Leak testing is another essential step in ensuring your PPR pipes are secure and won’t fail during operation.
Why Leak Testing is Crucial
Leaks in a plumbing system can lead to water damage, reduced water pressure, and higher utility bills. Leak testing helps identify weak points in the system before they cause significant damage.
Methods of Leak Testing
- Visual Inspection: Check all joints, fittings, and connections for any visible water droplets or wet areas.
- Dye Testing: A special dye can be injected into the system to identify leaks, especially in areas that are difficult to see.
- Pressure Hold Test: Similar to pressure testing, this test involves maintaining pressure in the system for a specific time and monitoring for any drop in pressure, which could indicate a leak.
Temperature Resistance Testing
PPR pipes are designed to handle both hot and cold water systems. However, it’s important to test their resistance to high temperatures, especially in systems that will carry hot water.
Importance of Temperature Resistance
PPR pipes are known for their high-temperature tolerance, but extreme heat can weaken the material over time. Temperature resistance testing ensures that the pipes can handle the thermal demands of the system.
How to Conduct a Temperature Resistance Test
- Heat the Water: Gradually heat water to the desired temperature (usually between 60-70°C for typical hot water systems).
- Apply to the Pipe: Expose the PPR pipe to this temperature for a specific period.
- Monitor for Deformation: After exposure, check the pipe for any signs of deformation, softening, or weakening of the material.

Fusion Quality Testing
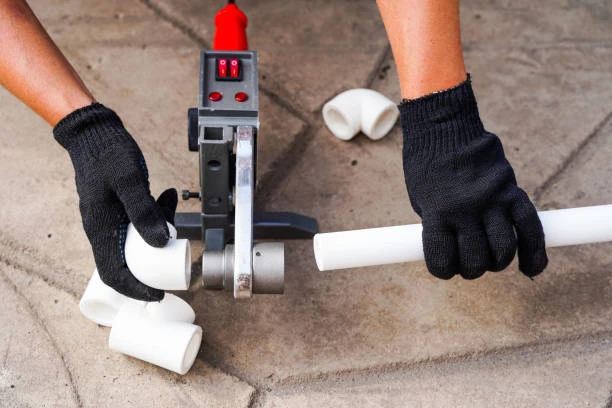
The fusion process is a key factor in the strength of the PPR pipe system. A properly fused joint creates a leak-proof, durable connection between pipes and fittings.
What is Fusion Quality Testing?
Fusion quality testing ensures that the pipes and fittings have been properly joined during installation. Improper fusion can lead to weak joints that may leak or fail under pressure.
How to Ensure Proper Fusion for PPR Pipe
- Check Fusion Tools: Make sure the fusion tool is calibrated and in good working condition.
- Inspect the Joint: After the fusion process, inspect the joint for smoothness and uniformity. A properly fused joint should be free of gaps, cracks, or burns.
- Perform a Stress Test: Apply pressure to the joint to test its strength. A properly fused joint will hold up under pressure without breaking or leaking.
Hydraulic Testing for Strength and Integrity
Hydraulic testing is used to check the overall integrity of the PPR pipe system and its ability to withstand the working pressures during normal use.
Purpose of Hydraulic Testing
This test simulates the real-world conditions of the system by applying a controlled amount of water pressure and monitoring how the pipes and joints respond.
Steps to Conduct Hydraulic Tests on PPR Pipe
- Fill the System: Completely fill the system with water, ensuring there is no air trapped inside.
- Increase Pressure Gradually: Slowly increase the pressure to the specified level, typically 1.5 times the maximum working pressure.
- Monitor for Issues: Watch for any signs of failure, such as pressure drop or visible leaks.
Tools and Equipment for PPR Pipe Testing
To conduct the tests mentioned above, you’ll need the right tools and equipment:
- Pressure Pump: For applying pressure to the system during pressure and hydraulic tests.
- Fusion Tool: Used for fusing PPR pipe and fittings.
- Manometer: A device for measuring pressure during testing.
- Leak Detection Dye: Used for leak testing.
Common Mistakes to Avoid When Testing PPR Pipe
While testing PPR pipes is crucial, it’s important to avoid some common mistakes that could result in inaccurate results or damage to the pipes.
- Incorrect Pressure Settings: Applying too much or too little pressure can lead to misleading test results.
- Poor Fusion Techniques: Incorrect fusion techniques can cause weak joints that may fail during operation.
- Overlooking Manufacturer Guidelines: Always follow the manufacturer’s instructions for pressure levels, temperature tolerance, and fusion techniques.
Maintenance and Care for PPR Pipes
Regular testing and inspection are essential for maintaining the integrity of PPR pipe systems. In addition to initial testing, periodic checks help ensure long-term durability.
The Future of PPR Pipe Testing
Advancements in technology may lead to more efficient and accurate testing methods for PPR pipes, making the process easier and more reliable.
Conclusion
Testing PPR pipes is a critical step in ensuring that your plumbing system operates safely and efficiently. From pressure and leak tests to fusion quality and temperature resistance, each test plays a vital role in the longevity of the system. By performing thorough testing and following the correct procedures, you can avoid costly repairs and ensure your PPR pipe system functions as intended for years to come.
Frequently Asked Questions (FAQs)
1. Why is pressure testing important for PPR pipes?
Pressure testing ensures that the piping system can handle the internal pressures without leaking or failing. It helps identify weak points in the system before use.
2. How do I know if the fusion joint is done correctly?
A proper fusion joint should be smooth, free of cracks or gaps, and firmly bonded. You can test the joint’s strength by applying pressure after fusion.
3. Can I test PPR pipes by myself?
Yes, you can perform many tests, such as visual inspection and pressure testing, by yourself, but for more advanced tests (like hydraulic testing), you may need professional assistance.
4. What is the maximum temperature PPR pipes can handle?
PPR pipes can generally withstand temperatures up to 95°C, making them suitable for hot water systems.
5. How often should I test my PPR pipes?
It’s essential to perform tests during installation, but periodic inspections and tests should be done every few years to ensure the system remains leak-free and efficient.


