Introduce PPR Pipe
PPR (Polypropylene Random Copolymer) pipes have become one of the most popular choices for modern plumbing and piping systems due to their durability, flexibility, and resistance to corrosion. Whether you’re building a new house, upgrading an existing system, or working on a commercial project, understanding how to properly install PPR Pipe is crucial for ensuring a reliable and long-lasting plumbing system.
In this guide, we’ll walk you through the step-by-step installation process of PPR pipes, covering everything from preparation to post-installation checks. We’ll also explain why PPR pipes are a great choice for plumbing and what tools you’ll need for the installation process. By the end of this article, you’ll have a solid understanding of how to install PPR pipes efficiently and effectively.
Why Choose PPR Pipe?
Before diving into the installation process, it’s worth understanding why PPR pipes have become such a popular choice for modern plumbing. Here are a few reasons:
- Durability: PPR pipes are highly durable and can last for up to 50 years with proper installation and maintenance.
- Corrosion Resistance: Unlike metal pipes, PPR pipes don’t rust or corrode, making them ideal for both water and heating systems.
- Low Maintenance: PPR pipes require minimal maintenance once installed.
- Eco-Friendly: Made from recyclable materials, PPR pipes are a sustainable choice for the environment.
- Ease of Installation: PPR pipes are easy to install using a fusion welding method, which ensures leak-proof connections.
Tools and Materials Needed for PPR Pipe Installation
Before starting your installation, you’ll need the following tools and materials:
Tools:
- PPR Pipe Cutter: To make clean, straight cuts on the pipes.
- PPR Welding Machine: For the fusion welding process to join PPR pipes and fittings.
- Measuring Tape: To ensure accurate pipe measurements.
- Pipe Support Brackets: To secure the pipes in place.
- Marker/Chalk: To mark the cutting points on the pipe.
- Pipe Deburring Tool: For removing sharp edges after cutting the pipe.
- Welding Mandrel (optional): Used for specific welding tasks when working with larger pipes.
- Pipe Bender (optional): For bending pipes to the required shape.
Materials:
- PPR Pipes: Ensure the pipes are of the correct diameter and type (e.g., hot or cold water).
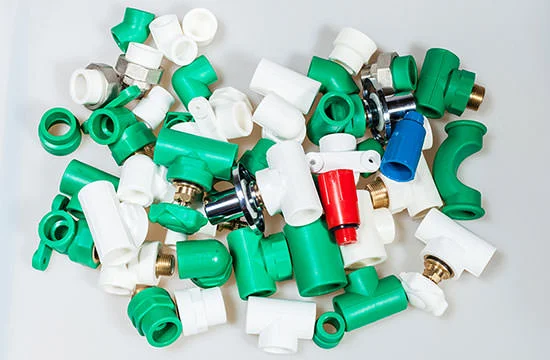
- PPR Fittings: These include elbows, tees, couplings, reducers, unions, etc.
- PPR Pipe Insulation: To protect against heat loss in hot water systems.
Step-by-Step Installation Method for PPR Pipe
Now that you have your tools and materials ready, let’s dive into the installation process for PPR pipes.
Step 1: Plan Your Piping Layout
Before starting any installation, it’s important to plan your piping layout. This ensures that you use the right fittings and pipes and prevents unnecessary mistakes. Follow these steps:
- Measure the pipe lengths: Use a measuring tape to determine the necessary lengths for each section of pipe.
- Determine pipe routing: Plan the most efficient path for the pipes, taking into consideration potential obstacles and the shortest route.
- Mark pipe entry points: Indicate where the pipes will enter and exit walls, floors, or ceilings, and ensure all pipes will be accessible for maintenance.
Step 2: Cut the PPR Pipe
Once your layout is finalized, the next step is to cut the PPR pipes to the required lengths. Here’s how to do it:
- Mark the cut points: Use a marker or chalk to mark the cutting points on the pipe.
- Cut the pipes: Use a PPR pipe cutter to make a clean, straight cut. Ensure the cuts are square to avoid issues during installation.
- Deburr the edges: After cutting, use a pipe deburring tool to remove any burrs or rough edges from the cut ends. This ensures a smooth connection between pipes and fittings.
Step 3: Clean the PPR Pipe and Fittings
Before proceeding with the fusion welding process, it’s essential to clean the pipe ends and fittings. This ensures that there is no dust, dirt, or debris that could affect the connection. Use a clean cloth to wipe down the ends of both the pipes and the fittings.

Step 4: Prepare for Fusion Welding
PPR pipe installation relies on fusion welding to create a strong, leak-proof bond between the pipe and fittings. Follow these steps to ensure the welding process is done correctly:
- Preheat the welding machine: Make sure the fusion welding machine is heated to the appropriate temperature, usually between 260°C and 280°C (500°F to 536°F), depending on the pipe size.
- Insert the pipe and fitting into the welding machine: Insert the pipe and fitting into the welding machine’s heating plates. Ensure the pipe and fitting are properly aligned with the machine’s mandrels.
- Wait for the required time: The pipe and fitting must be heated for a specified period, typically around 5–10 seconds, depending on the pipe diameter.
Step 5: Weld the Pipe and Fitting Together
After the heating period, the next step is to join the pipe and fitting using the fusion welding machine:
- Join the pipe and fitting: Remove the pipe and fitting from the heating plates and immediately insert them together while they are still hot. Push them until they are fully seated, and hold them in place for a few seconds to allow the weld to set.
- Check for proper alignment: Ensure the pipe and fitting are perfectly aligned. Misalignment can lead to weak connections and leaks.
Step 6: Let the Connection Cool
Once the pipe and fitting are joined, allow the fusion joint to cool. This cooling period is crucial for the weld to set and ensure a strong, leak-proof connection. Cooling times can vary depending on the pipe size, but generally, you should allow a few minutes for the joint to cool completely.
Step 7: Install the Pipes
With the fusion welds completed, it’s time to install the pipes in place. Follow these steps:
- Secure the pipes: Use pipe support brackets to secure the pipes to the wall or floor. Ensure that the pipes are not under stress or bending sharply.
- Test for leaks: Once the pipes are in place, conduct a leak test by turning on the water supply and checking the connections. If any leaks are detected, you may need to redo the fusion weld.
Step 8: Insulate the Pipes (Optional)
If you’re installing pipes for a hot water system, it’s a good idea to insulate the pipes to reduce heat loss and improve energy efficiency. Wrap the pipes in foam or other insulation material to protect them from temperature fluctuations.
Step 9: Final Inspection
Once everything is installed, perform a final inspection to ensure everything is in place. Double-check for any misalignments, leaks, or other issues that could affect the system’s performance.
Maintenance Tips for PPR Pipe
PPR pipes are low-maintenance, but regular upkeep will help extend their lifespan. Here are some maintenance tips to keep your system running smoothly:
- Check for Leaks: Regularly inspect the joints for leaks, especially after the system has been in use for a while.
- Avoid Excessive Pressure: Ensure that your system doesn’t operate under excessive pressure, as this could cause damage to the pipes or fittings.
- Protect from UV Exposure: While PPR pipes are resistant to UV rays, long-term exposure to direct sunlight can cause degradation. Use UV-resistant coatings or keep pipes covered when installing them outdoors.
- Clean the Pipes: Periodically flush the system to remove any sediment or debris that may have built up inside the pipes.
Conclusion
Installing PPR pipes requires careful planning, the right tools, and an understanding of the fusion welding process. By following the steps outlined in this guide, you can ensure that your PPR pipe system is installed correctly and will provide you with long-lasting, efficient performance. With minimal maintenance and a lifespan of over 50 years, PPR pipes are an excellent investment for any plumbing or piping system.
Frequently Asked Questions (FAQs)
- How long do PPR pipes last?
- PPR pipes are known for their durability and can last for over 50 years with proper installation and maintenance.
- Can I install PPR pipes myself?
- Yes, if you have the right tools and follow the installation steps carefully, you can install PPR pipes yourself. However, if you’re unsure, it’s best to hire a professional plumber.
- Do PPR pipes require special tools for installation?
- Yes, PPR pipes require a fusion welding machine and specialized pipe cutters for a proper installation.
- Can PPR pipes be used for both hot and cold water systems?
- Yes, PPR pipes are suitable for both hot and cold water systems due to their high temperature resistance.
- What should I do if a PPR pipe fitting leaks?
- If a fitting leaks, you may need to redo the fusion weld. Ensure the pipes are properly aligned and the welding process was carried out correctly.


