Introduce PPR Pipe
PPR (Polypropylene Random Copolymer) pipes have become a popular choice in plumbing due to their durability, corrosion resistance, and ease of installation. However, like any plumbing material, PPR Pipe may require repairs or replacement over time. This article explores little-known tricks and techniques to effectively repair and replace PPR pipes, ensuring your plumbing system remains efficient and leak-free.
Understanding PPR Pipe
Before diving into repair and replacement strategies, it’s essential to understand the unique properties of PPR pipes:
- Durability: PPR pipes have a lifespan exceeding 50 years, making them a long-term investment.
- Corrosion Resistance: Unlike metal pipes, PPR does not rust, ensuring clean water transport.
- Lightweight: PPR pipes are lighter than traditional materials, making them easier to handle and install.
- Thermal Stability: They can withstand high temperatures, suitable for hot and cold water applications.
Despite these advantages, PPR pipes may still face issues like leaks, cracks, or general wear and tear, necessitating repairs or replacements.
Common Issues with PPR Pipe
Before learning the tricks for repairs and replacements, it’s essential to identify common issues that can arise with PPR pipes:
- Leaking Joints: Often caused by improper heat fusion during installation.
- Cracks or Breaks: Can result from impact damage or excessive pressure.
- Thermal Expansion: PPR pipes can expand and contract with temperature changes, potentially leading to joint failure.
- Blockages: Accumulation of debris or mineral buildup can restrict flow.
Understanding these issues will help in applying the right tricks during repairs and replacements.
Tricks for Repairing PPR Pipe
Repairing PPR pipes often requires specific techniques to ensure effective fixes. Here are some little-known tricks:
1. Using Heat Fusion for Leaky PPR Pipe Joints
Leaky joints can be a significant issue in PPR systems. Instead of replacing entire sections, consider these steps:
- Identify the Leak: Locate the exact point of leakage.
- Reheat the Joint: Use a heat fusion tool to gently reheat the joint. This process will soften the existing joint material.
- Reapply Pressure: Once heated, gently press the joint back together to reform the bond.
- Cool Down: Allow it to cool for the recommended time before testing for leaks.
2. Utilizing a Repair Sleeve
For small cracks or holes in PPR pipes, a repair sleeve can be a quick solution:
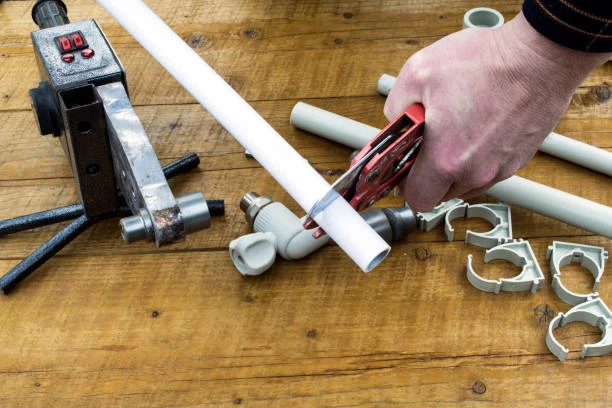
- Cut the Damaged Section: Use a pipe cutter to remove the damaged area cleanly.
- Select an Appropriate Sleeve: Choose a PPR repair sleeve that fits over the pipe.
- Apply Heat: Heat the sleeve and the ends of the pipe.
- Slide the Sleeve Over the Damage: Quickly position the sleeve over the crack and hold it until it cools and sets.
3. Using Epoxy for Small Cracks
If you have minor cracks that do not require extensive repairs, consider using a strong epoxy:
- Clean the Area: Ensure the crack area is clean and dry.
- Apply Epoxy: Mix the epoxy according to the manufacturer’s instructions and apply it directly to the crack.
- Smooth the Surface: Use a putty knife to smooth the epoxy for a flush finish.
- Cure Time: Allow sufficient curing time before putting the pipe back into service.
4. Incorporating Expansion Loops
To combat thermal expansion, you can create expansion loops in long runs of PPR pipe:
- Design the Layout: Plan your piping layout to include loops that can absorb thermal expansion.
- Install Properly: Use brackets and supports to secure the pipes in the loops, allowing for movement without stress on the joints.
5. Preventive Maintenance Techniques
Prevention is often the best approach. Incorporate these maintenance tricks:
- Regular Inspections: Routinely check for signs of wear, leaks, or thermal expansion.
- Temperature Monitoring: Ensure that water temperatures do not exceed the recommended limits for PPR pipes.
- Install Filters: Adding filters can help prevent debris buildup, reducing the risk of blockages.

Tricks for Replacing PPR Pipe
When repairs are no longer sufficient, replacing PPR pipes may be necessary. Here are some tricks to make this process smoother:
1. Proper PPR Pipe Planning and Measurement
Accurate measurements are crucial for a successful replacement:
- Measure Twice: Before cutting new pipes, measure the lengths needed and double-check your calculations.
- Account for Fittings: Include the lengths of fittings in your total measurement to avoid miscalculations.
2. Using Compatible Fittings
When replacing sections of PPR pipe, ensure you use compatible fittings:
- Manufacturer Recommendations: Always choose fittings that match the specifications of your PPR pipes to ensure compatibility and maintain system integrity.
- Transition Fittings: If transitioning to other materials, use appropriate transition fittings designed for compatibility.
3. Heat Fusion Techniques for New Installations
When installing new PPR pipes, use effective heat fusion techniques:
- Follow Temperature Guidelines: Ensure your heat fusion tool is set to the appropriate temperature for PPR.
- Heat Evenly: Rotate the pipe and fitting during heating to ensure even temperature distribution.
- Practice Timing: Timing is crucial; be aware of the specific heating and cooling times for your setup to avoid overheating or underheating.
4. Using Pipe Supports
Proper support during installation can prevent future problems:
- Install Pipe Supports: Use supports every 3-4 feet for horizontal runs to prevent sagging.
- Consider Thermal Movement: Leave space for expansion and contraction in your supports to accommodate temperature changes.
5. Testing After Replacement
After replacing sections of PPR pipes, thorough testing is essential:
- Pressure Test: Conduct a pressure test on the new installation to check for leaks and ensure system integrity.
- Monitor Closely: After initial testing, monitor the system for the first few days to catch any potential issues early.
Conclusion
Repairing and replacing PPR pipes can be straightforward with the right tricks and techniques. From re-fusing leaky joints to planning effective replacements, understanding how to work with PPR pipes ensures a reliable plumbing system. With these little-known tips, both homeowners and professionals can tackle PPR pipe issues confidently, maintaining the integrity and efficiency of their plumbing systems.
FAQs
- What is the lifespan of PPR pipes? PPR pipes can last over 50 years with proper installation and maintenance.
- How can I fix a leaking joint in a PPR pipe? You can reheat the joint and apply pressure to re-form the bond, or use a repair sleeve for small leaks.
- What are the benefits of using PPR pipes? PPR pipes are durable, corrosion-resistant, lightweight, and have good thermal stability.
- Can I use epoxy to repair cracks in PPR pipes? Yes, for minor cracks, applying a suitable epoxy can provide a quick and effective repair.
- How should I prepare for replacing PPR pipes? Proper planning, accurate measurements, and the use of compatible fittings are key to a successful replacement.


