

Summary: Simplifying PEX Water Line Installation for Your Home
Installing a PEX water line has become a popular choice for homeowners due to its flexibility, durability, and ease of use. Whether you’re upgrading your plumbing system or adding new water lines, understanding the installation process is essential to ensure a leak-free, long-lasting system. This comprehensive guide will walk you through the basics of PEX water lines, the tools and materials needed, step-by-step installation instructions, common pitfalls to avoid, and maintenance tips. By following this guide, homeowners can confidently tackle their PEX water line projects with professional results.
Frequently Asked Questions (FAQ)
1. What is a PEX water line?
A PEX water line is a flexible plastic tubing system used for residential water supply that resists corrosion and freezing.
2. Can I install PEX water lines myself?
Yes, with basic plumbing knowledge and the right tools, homeowners can install PEX water lines safely.
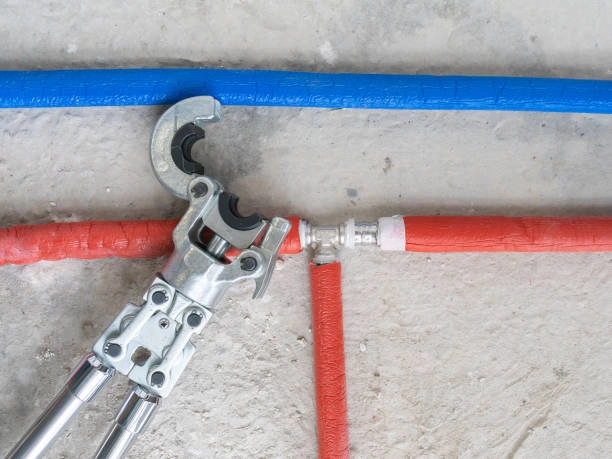
3. What tools do I need for PEX installation?
Common tools include a PEX cutter, crimp or expansion tool, fittings, and a go/no-go gauge.
4. How long do PEX water lines last?
Properly installed PEX lines can last 25 to 50 years or more.
5. Are PEX water lines safe for drinking water?
Yes, PEX tubing is approved by health authorities for potable water use.
What Is a PEX Water Line? Definition and Features
PEX stands for cross-linked polyethylene, a durable and flexible plastic tubing used for water distribution. PEX water lines have several advantages over traditional copper or PVC pipes, including:
- Flexibility: Easily bends around corners, reducing the need for fittings.
- Corrosion resistance: Unlike metal pipes, PEX does not rust or corrode.
- Freeze resistance: PEX can expand slightly to resist freezing damage.
- Easy installation: Requires fewer tools and less labor compared to rigid pipes.
- Cost-effectiveness: Generally less expensive in materials and labor.
These features make PEX water lines ideal for both new constructions and remodeling projects.
Tools and Materials Needed for PEX Installation
Before starting, gather the following essentials:
- PEX tubing (sizes typically ½", ¾", or 1")
- Fittings (crimp, clamp, or expansion style depending on system)
- PEX cutter (for clean, precise cuts)
- Crimp or clamp tool (for securing fittings)
- Expansion tool (if using expansion fittings with PEX-A)
- Go/no-go gauge (to verify proper crimping)
- Pipe supports and clamps
- Teflon tape or pipe dope (for threaded fittings)
- Measuring tape, marker, and safety equipment
Having the right tools ensures a smooth installation process.

Step-by-Step PEX Water Line Installation Guide
1. Plan Your Layout
Start by mapping out the water line route, measuring lengths needed, and deciding fixture connections. Account for bends and avoid sharp angles.
2. Cut the PEX Tubing
Use a dedicated PEX cutter to make clean, straight cuts. Avoid twisting or crushing the tubing.
3. Attach Fittings
Depending on your system:
- For crimp fittings, slide the copper ring over the tubing, insert the fitting fully, and compress the ring with a crimp tool.
- For clamp fittings, position the stainless steel clamp ring over the tubing and tighten with a clamp tool.
- For expansion fittings (PEX-A), expand the tubing end with an expansion tool, insert the fitting, and let the tubing contract.
4. Secure Tubing
Use pipe supports or clamps to fasten the tubing every 32 inches horizontally and every 6 feet vertically to prevent sagging.
5. Pressure Test the System
Once installed, test for leaks by pressurizing the system and inspecting all connections carefully.
6. Make Adjustments
If leaks appear, tighten clamps or replace faulty fittings promptly.
Common Mistakes to Avoid
- Using improper tools or fittings for your PEX type.
- Over-bending the tubing, causing kinks or cracks.
- Skipping support clamps, leading to stress and movement.
- Failing to test for leaks before closing walls or floors.
- Incorrect cutting, resulting in poor-fitting connections.
Avoiding these errors will extend your system’s lifespan and reliability.
Maintenance Tips for PEX Water Lines
- Regularly check visible fittings and connections for moisture.
- Replace worn or damaged fittings immediately.
- Insulate exposed tubing in unheated areas to prevent freezing.
- Keep installation manuals and system maps handy for future reference.
- Schedule routine plumbing inspections to catch issues early.
Proper maintenance maximizes performance and minimizes costly repairs.
PEX Water Line Advantages Over Traditional Pipes
| Feature | PEX Water Line | Copper Pipe | PVC Pipe |
|---|---|---|---|
| Flexibility | Very flexible | Rigid | Semi-rigid |
| Corrosion Resistance | High | Can corrode over time | High |
| Freeze Resistance | Good (expands slightly) | Poor | Poor |
| Installation Speed | Fast and easy | Labor-intensive | Moderate |
| Cost | Lower | Higher | Low |
| Lifespan | 25–50 years | 50+ years | 25–40 years |
| Noise Level | Quiet | Noisy | Moderate |
Conclusion
Installing a PEX water line is an excellent choice for homeowners seeking a reliable, flexible, and cost-effective plumbing solution. By understanding the materials, tools, and step-by-step procedures, you can confidently handle your plumbing projects and enjoy the benefits of modern PEX technology. Remember to plan carefully, use the right tools, avoid common mistakes, and maintain your system regularly for lasting performance.
If you’re ready to upgrade your plumbing system, PEX water line installation offers a practical and efficient pathway to modern water delivery.